Various Sources for Renaissance Italian embroidery/ drawn thread work…

I. Punto Antico
From http://www.florin.ms/puntoantico.html
Drawn-thread work has its origins in the distant past: it is carried out by counting threads and fashioning an infinity of stitches drawn from these basic ones: Square Stitch, right angled or oblique (which surrounds the meshwork and subdivides the work into small spaces thus making the thread counting easier); and the Lily or Faggot Stitch (which completes and finishes the other stitches), and the more particular stitches of which there are numerous varieties; Curl Stitch, Spirit Stitch, Royal Stitch, Air or Mesh Stitch, Aemilian Stitch, Flat or Satin Stitch, Written Stitch, and Web Stitch. The use of these stitches, brought together and composed according to the embroiderer’s fancy, creates a work that is splendid and very personal.
Passerotti’s book which documents the history of the Aemilian Art, shows how Bolognan nobility came to acquire these forms of embroidery together with drawn-thread work for bed covers, curtains, tablecloths, etc. Binetti Ventura in her 1910 book, Laces and Sicilian Women, recounts how drawn thread work had geometrical forms acquired from Arab culture and that Sicily had been the cradle of excellence for this thread-counting craft. In her work Ancient and Modern Italian Embroidery Emilia Ricci speaks of drawn-thread work ‘booklets in which the motifs were constantly changing, had an enormous diffusion, an ardent following and continued detailing of designs, being engraved and printed to publish and republish them, changing the woodcuts even of one country for another.’
The oldest of these booklets are German, one published at Zwichau in 1525 and the other at Cologne in 1527. It is not known whether there were earlier publications in Italy. A 1547 catalogue proves that in 1500 it was customary for women to copy onto a piece of beautiful cloth, as in a notebook, the stitches, the drawn thread work, and the designs that pleased them most. Such a sampler, jealously guarded, came to be handed down generation upon generation and consulted each time there was need to carry out a piece of drawn-thread work. Even though centuries passed the technology dominated all aspects of the production; in embroidery work time itself seems to stand still.
At the ‘Embroidery School’ in Borgo San Lorenzo drawn-thread work is taught by Maria Luisa Baldini, who grew up in this art at Barberino di Mugello, which had an ancient tradition of embroidering with drawn thread work. Signora Baldini says, in fact, that she learned drawn-thread work from her mother and from her aunt who together had a school with many pupils, where they used to carry out the most beautiful work for the use of customers who were not only Florentine or Tuscan, being esteemed throughout Italy.
Their designs were on parchment or sometimes on plain, poor paper, but their skill could create splendid objects. Maria Luisa since she was small had lived in this atmosphere and her aunt gave her a passion for perfection which caused her to create and to have be created true works of art in embroidery. In listening to her story we remember the world described by Palazzeschi in Mattress Sisters. Now as then the women who attend the Embroidery School carry out splendid work under the careful and practical teaching of Maria Luisa, using the same preparatory procedures, recopying on the cloth the increasingly complex stitches made with curls, with written web stitches, etc., with the sole exception that now instead of parchment we have photocopiers and computers.
Square Stitch
This is the basic Stitch for drawn-thread work embroidery. It is worked from right to left, according to the design always counting four threads. It is illustrated in Figure 1 below. This stitch is used for edges and hems of all types of drawn thread work. To do the Square Stitch, use number 8 or number twelve thread, according to that of the cloth, which it needs to match.
I.

Design with Square, Lily, and Satin Stitches

Lily Stitch
First a row of Square Stitches is done with four threads to four, then six threads are removed and one carries out a second row with faggots of six threads, as shown in the Figure 2, then this is competed with a second row of Square Stitches as in Figure 3. The Lily Stitch is par excellence the most useful stitch for drawn thread work and is best even for hemming. To do the Lily Stitch, use number 8 or 12 thread according to the cloth, which it needs to match.
Princess Stitch
This is carried out counting four threads as in the figure, with one in front, another back. To do the Princess Stitch, use number 8 or 12 thread according to the cloth which it needs to match.
IIa.

Enlargement showing detail
IIb.

Flat or Royal or Satin Stitch
This is carried out always counting four threads according to the figure. See above image. To do the Flat Stitch, use number 8 or 12 thread according to the cloth which it needs to match.
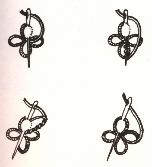
Mist Stitch
This is done with the needle placed where one wants to come out at the end of the stitch (see the example), winding the thread several times around the needle, according to the length of the stitch (see the example) , taking care to wind the thread tight about the needle. Draw the thread (see the example), and place the point at the base. Take it out again at this point and begin again as shown in the example. To do Smoke Stitch a particular fabric is not necessary. But in drawn thread work care must be taken with the length of the stitches which need to match the threads of the fabric. To do the Mist Stitch, use number 8 or 12 thread according to the cloth which it needs to match.
Openwork Stitch
The cloth is punched with a small hole, which is then bound with Cord Stitch, or, more elaborately, with a reverse Button Hole Stitch. To do the Openwork Stitch, use number 8 or number twelve thread, according to that of the cloth, which it needs to match. Examples can be seen in III below with the smaller and round openings in the central design.
II. Il Gigliuccio – Peahole Hemstitch
Some call the Gigliuccio the Fleur des lys stitch and associate it with Florence and the lily. Some associate it with the Gigliucci family of Fermo, Italy where it is said there is evidence of the stitch as far back as the end of the 1600s. We might be safe to say it is definitely an Italian stitch from the region that became Italy in the late 1800s – because technically Italy was not officially “Italy” before the Unification. I say ‘might’ because when I did finally find something that looked like the Gigliuccio I’d seen in RAKAM, it was in a Schwalm book by Renate Fernau and it was called the Peahole Hemstitch.
If you don’t care too much about where it came from, then we can move on to what it is, because here, more or less most people are in agreement. More or less. 😉

Basically it is a Drawn-Thread technique consisting of groups of knotted bundles in an open channel between two rows of Four-Sided Stitch, also known as Italian Hemstitch. There is a tutorial for executing it on the right side of the fabric here, and a two-part tutorial for using it to secure a hem, executing it on the back side of the work starting here and ending here.
III. Ricamo d’Assia
From http://italian-needlework.blogspot.com/2010/04/ricamo-dassia.html
Guida al ricamo d’Assia is packed full of colour instructional photos explaining over 30 stitches. There are projects with varying levels of difficulty and even a bit about the stitches that surround the traditional motifs. The text is in Italian but the photos and diagrams are so good that you’ll be able to figure out what to do without the written instructions. You can get it direct from the author Stefania Bressan. There is a book review at Tuttoricamo under “Books” and then “Pulled Thread and Schwalm Embroidery”.
I mention this technique here because it did have me researching it for awhile before I figured out what it was, so if anyone else out there happened to wonder, now you know. If you’re anything like me though, you are easily distracted by beautiful embroidery and this is well worth a look from the Italian point of view.
This delightful little pincushion is a gift that I received from Italy:

IV. Herbarium – fiori e colori a reticello
From http://www.filofilo.it/eng/embroidery-books
Vol. 1 – Retini di fondo (Pulled Thread Work)

Retini di fondo (Pulled Thread Work) is useful for learning how to handle the fabric: the threads must pass through warp and weft following well-defined patterns. This is why for beginners I suggest simpler work in “squares”; I then proceed to projects in round or oval areas, and later more complicated shapes. The manual includes diagrams and scans of finished projects and detailed explanations of working techniques.

In this volume Herbarium, I collected some nonclassical reticello works developed over the last years with my embroidery school Filofilò, starting with ‘Miranda’s sampler’, published at the end of my manual no. 5, Fior di reticello, in 2007.
